Help In depth
Projects and the editor
The steps' diagram, each step's own editor, questions and branches, music and backgrounds, and previews.
A project puts your media together in steps: scenes of video, images and text, questions for viewers, and (in interactive projects) steps that choose where to go next. It's made into a video on Publish, in the editor's bar. The quick guide is Build a project and export a video.
Make as many projects as you like, as long as you like, for free. Sharing one by link needs Pro, for the storage it plays from.
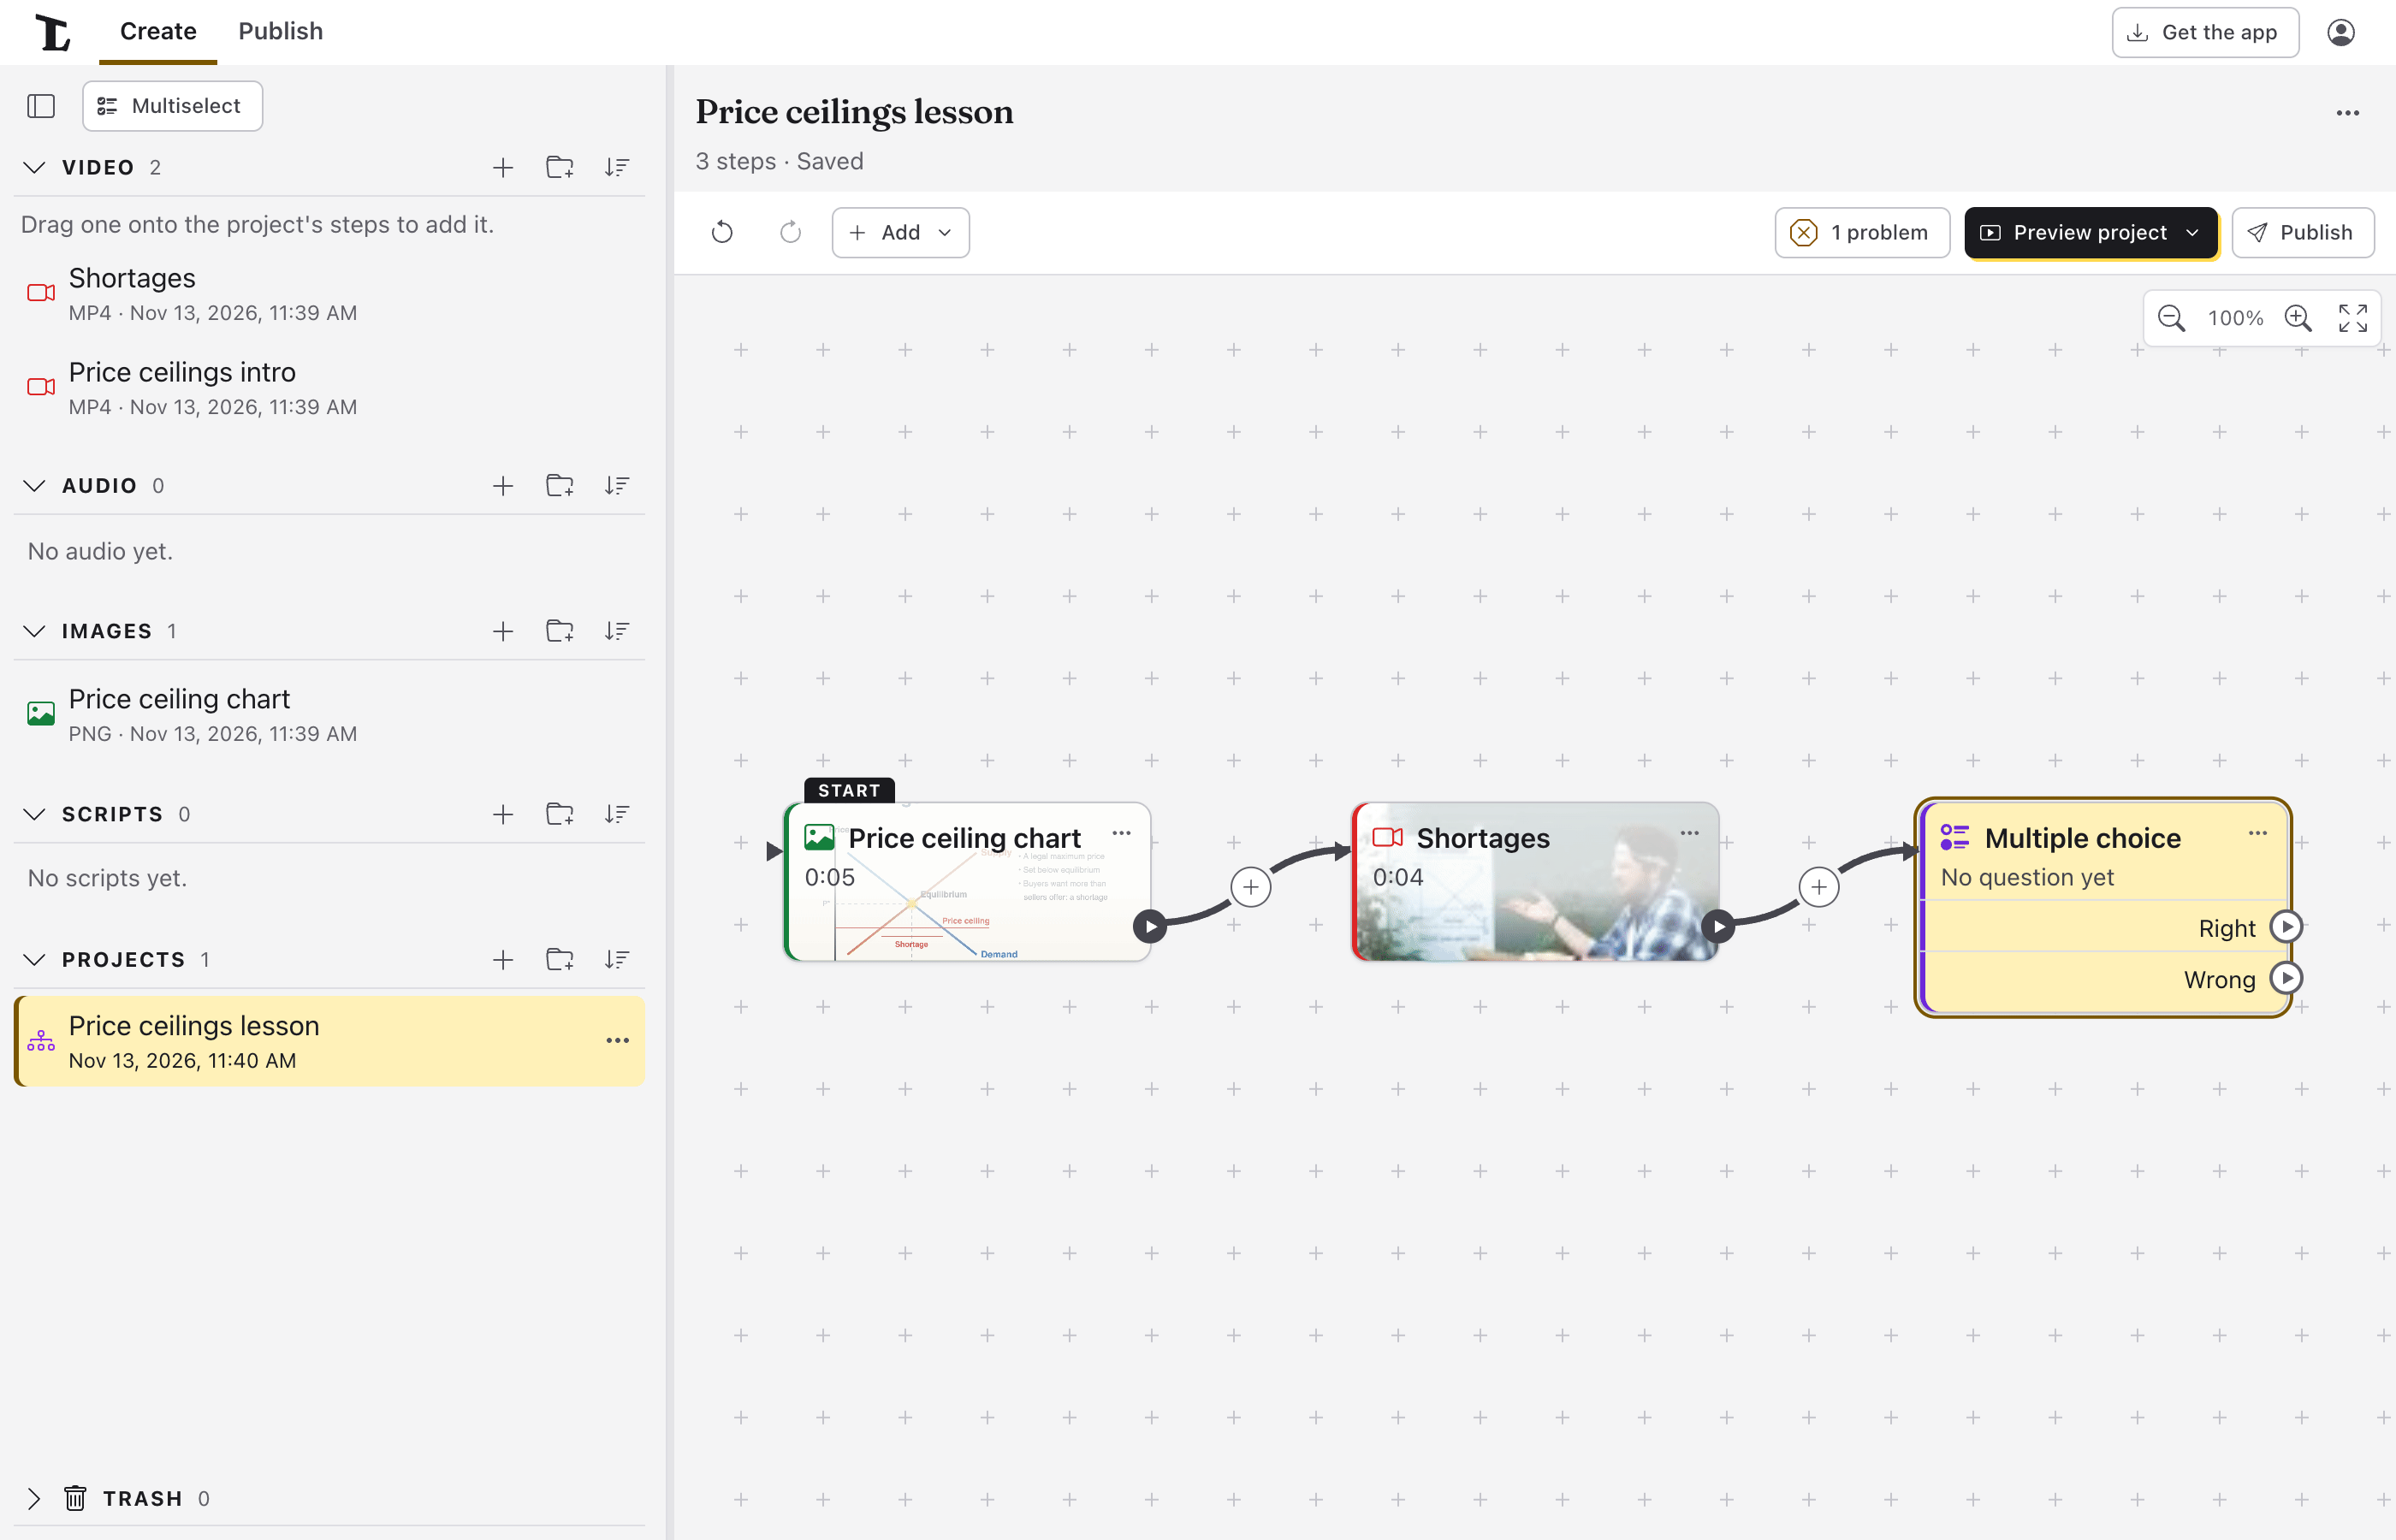
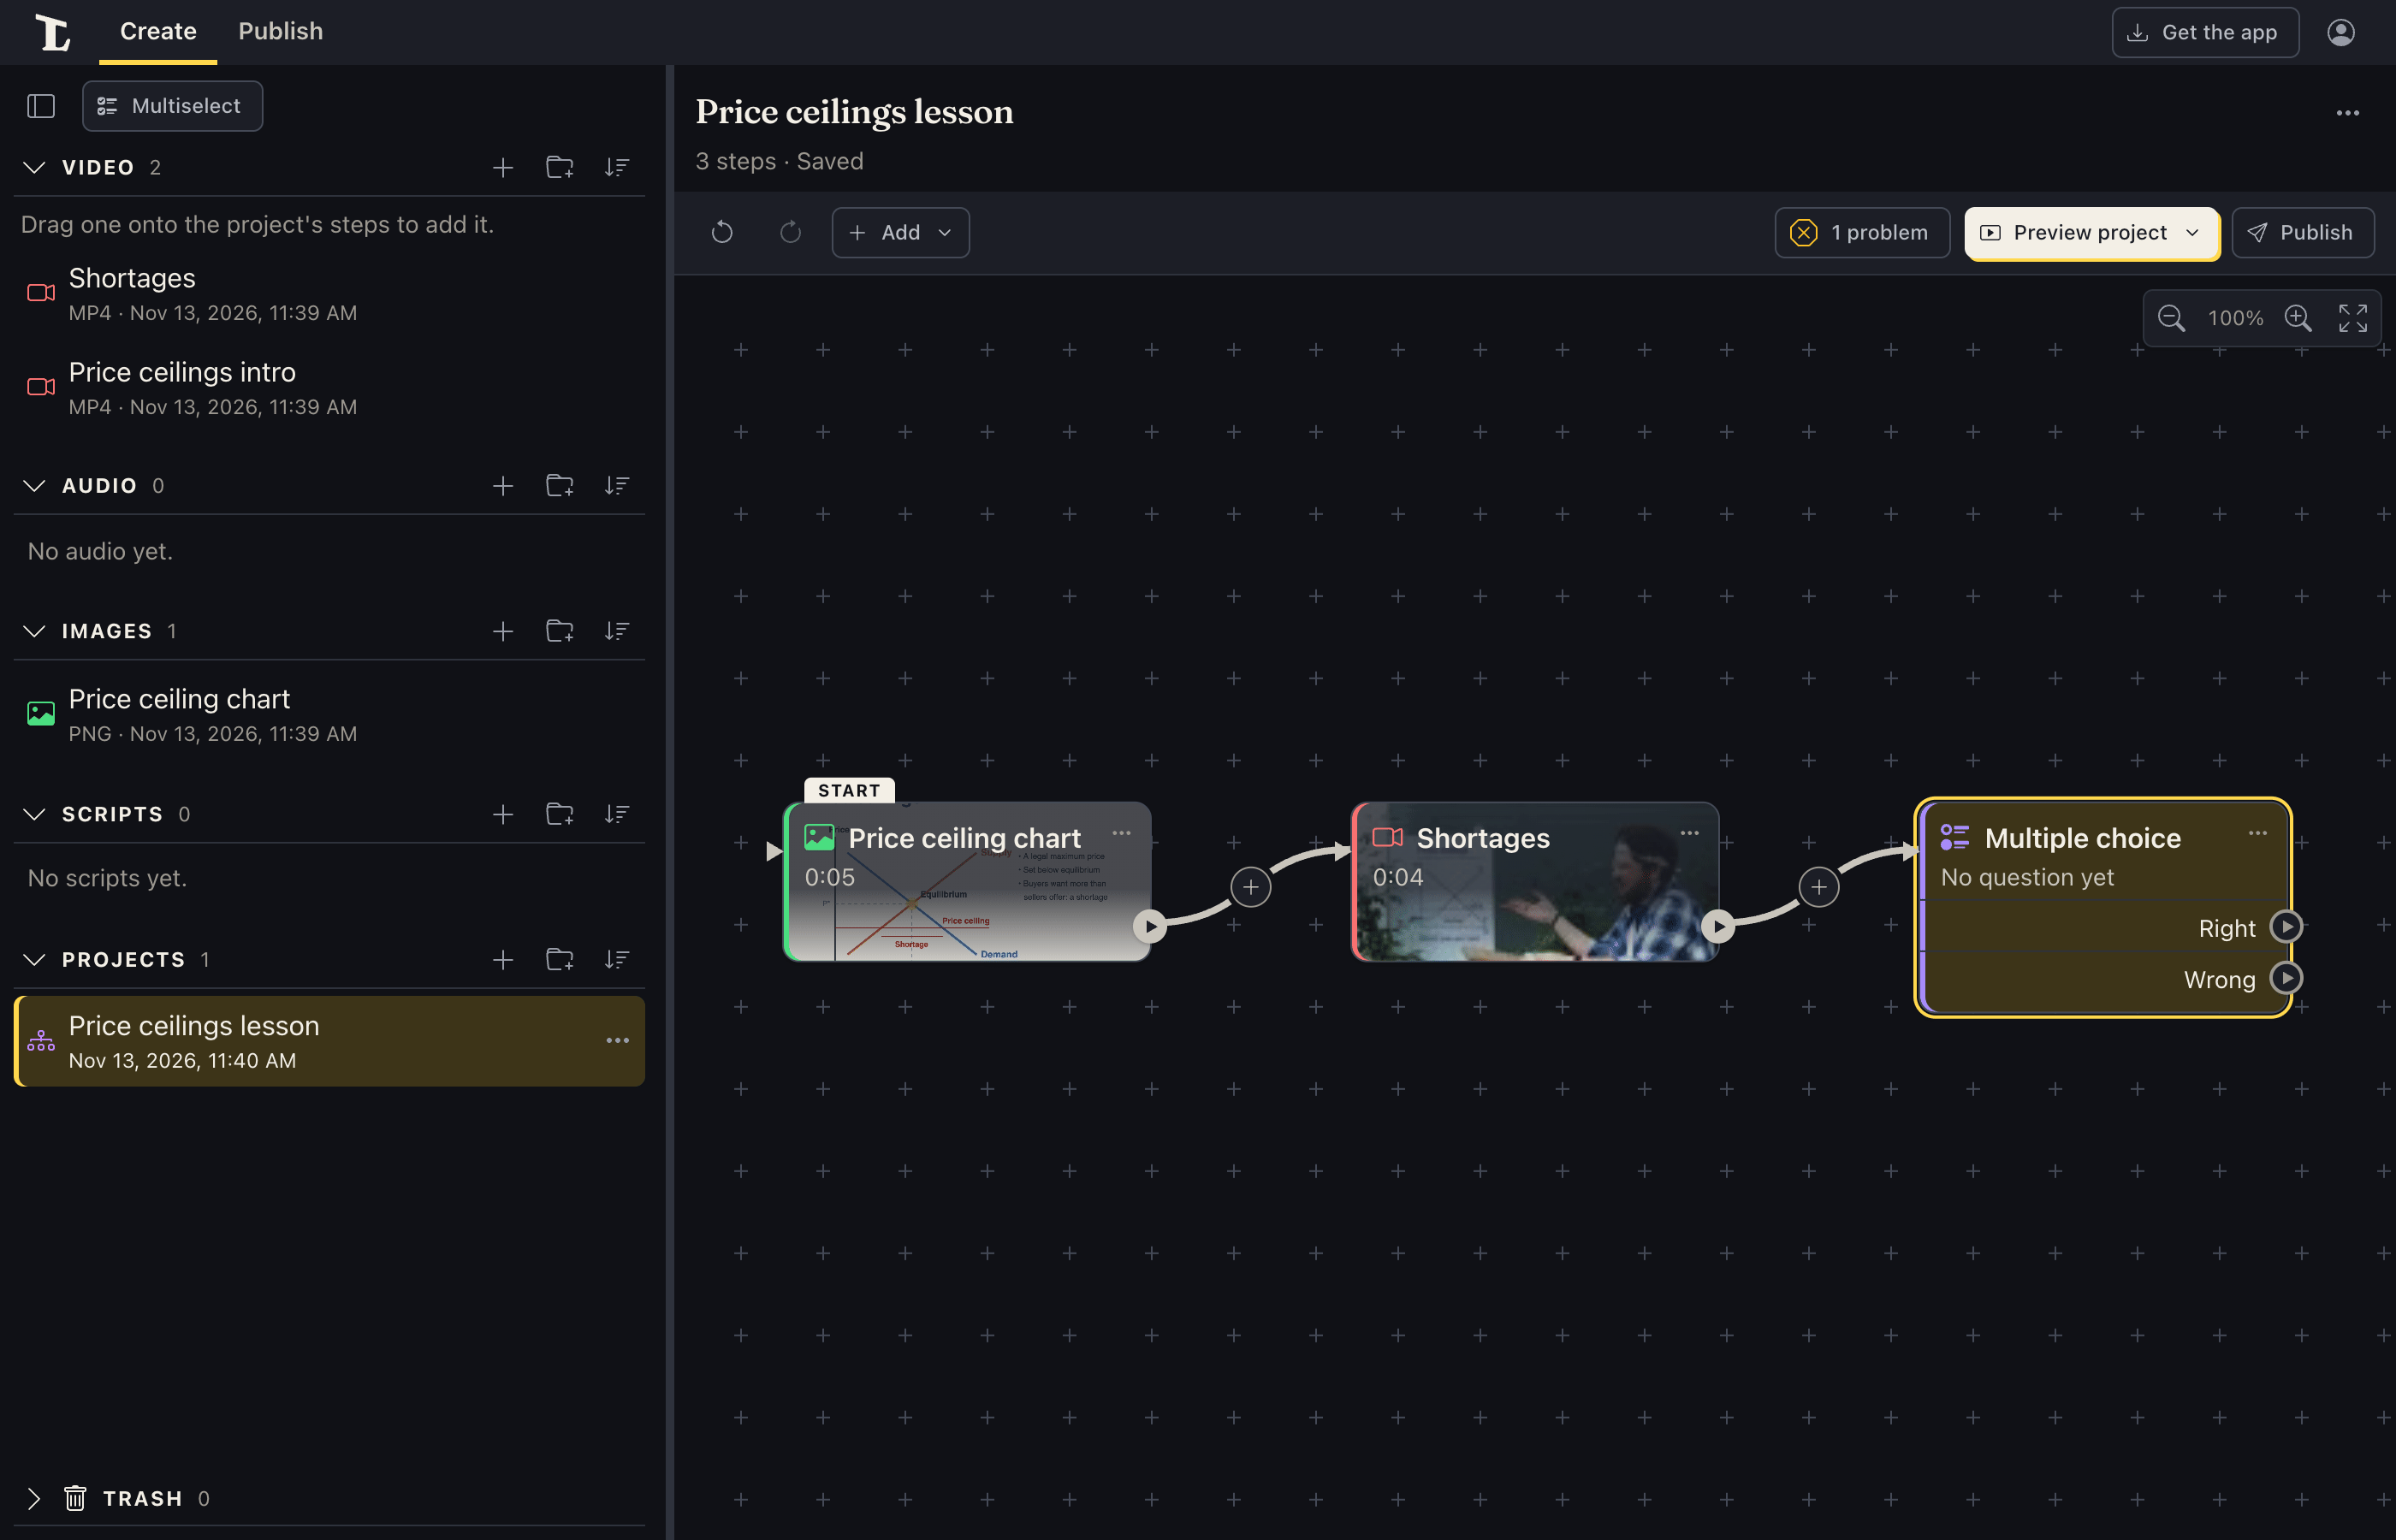
The editor has, from the top:
- The project's name, and under it how many steps it has, and Saving… or Saved. Its ⋯ has Project settings, Rename, Move to folder and Delete.
- The bar: Undo and Redo, Add, the problems button (only when there are problems), Preview project and Publish (its icon, on a phone).
- The steps, as a diagram, with all the room. Tap a step to open it in its own editor, over the steps (see A step's own editor).
Saving
A project saves itself a moment after each change; the line under its name says Saving…, then Saved. It also saves when you leave it. Ctrl S (⌘ S on a Mac) saves at once. If a save fails, the line says Not saved, in red, with a Save button to try again.
Undo and Redo (Ctrl Z and Ctrl Shift Z) go back and forward through your last 100 changes.
Starting a project
The + beside Projects in the library makes one, in two steps.
Details. Its name, and a Format: YouTube video, YouTube Shorts, Instagram Reels, TikTok, Feed post, Square, or Custom to pick the shape yourself. Shorts and Reels take up to 3 minutes and TikTok up to 10: past that, the editor and Publish say so. Then its Output and folder. Click Next.
How it starts.
- Blank: an empty project, to build step by step.
- Sequence: clips and images in order, with music underneath. Add a clip or image… for each, in the order they play (the arrows move one earlier or later), and Add music… for one sound file under the whole of it. How long each plays: full length, the same time each (a picture always gets the time you set), or the music's length shared between them. Untick Keep the clips' own sound to hear only the music. It says how long it'll be.
Click Create: it opens in the editor, to change like any project.
A blank project asks What comes first?:
- Add a video or image: pick one from your library.
- Record a video: the recorder opens; once the recording is saved, you're back in the project with it added.
- Ask a question: a multiple-choice question, opened to write.
Or drag something from the library onto it. Until then, the project isn't counted as having problems.
The shape and the length limit are in Project settings later (Shape, Length limit).
Output: Rendered video, Interactive, or Both
Each project makes one of three things. Choose it when you make the project (New project › Output), or later in Project settings (the project's ⋯) › Output.
- Rendered video: a chain of clips and images, made into a video file. Questions show as cards for a few seconds, then the answer. Steps that branch aren't offered.
- Interactive: questions and branches, played in the app or from a shared link. Viewers answer, and where they go next can depend on their answers.
- Both: interactive, plus one path through the steps, made into a video file. The lines along that path are heavier, and where some steps are on it and some aren't, the ones on it are marked Video.
An interactive project is shared whole, by link, from Publish: see Share a project by link.
Shape: wide, tall, square
A project's picture is one of five shapes. Its Format sets it when you make the project (or Custom › Shape), and you can change it later in Project settings › Shape.
- Wide (16:9): YouTube, a website, a class or a TV. Where every project starts.
- Tall (9:16): TikTok, Instagram Reels, YouTube Shorts, and phones held upright.
- Square (1:1): feeds that show every shape, like Facebook, LinkedIn and X.
- Portrait (4:5): Instagram and Facebook posts, as big as a feed shows them.
- Classic (4:3): older videos, slides made at 4:3, or a document camera.
Changing the shape of a project you've worked on keeps it looking right: whatever fills the frame still fills it; a picture in a box, like the camera in a corner, keeps its own shape and stays near the same corner; and text keeps its size and rewraps to the new width. Look it over in a preview, and Undo puts it back. Text sizes are a share of the frame's short side, so text reads the same in every shape.
Steps: the diagram
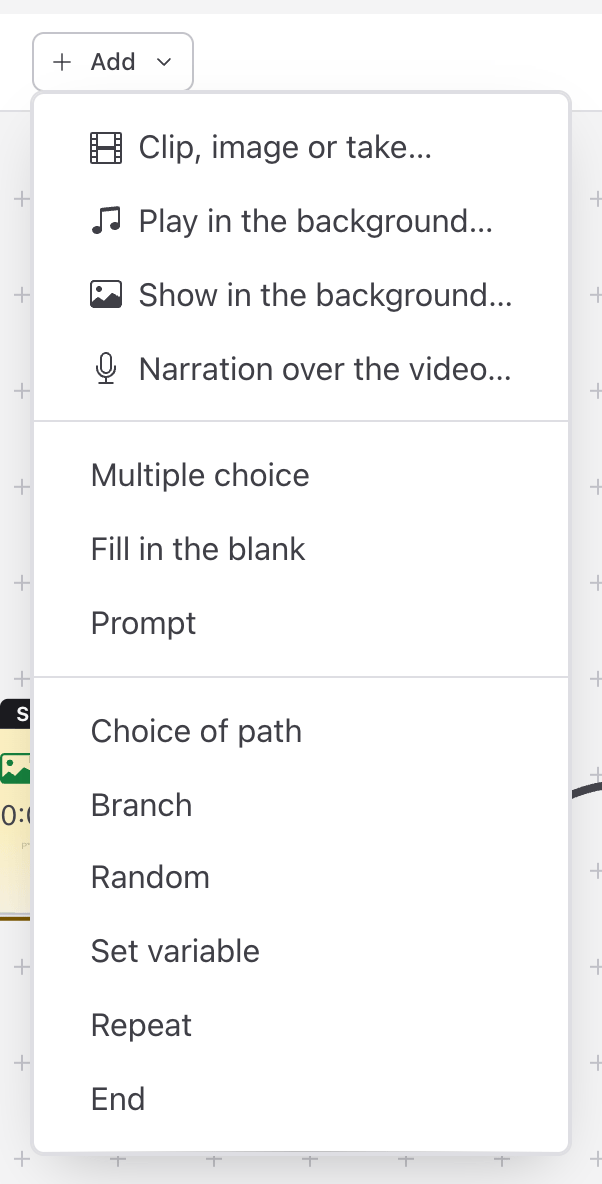
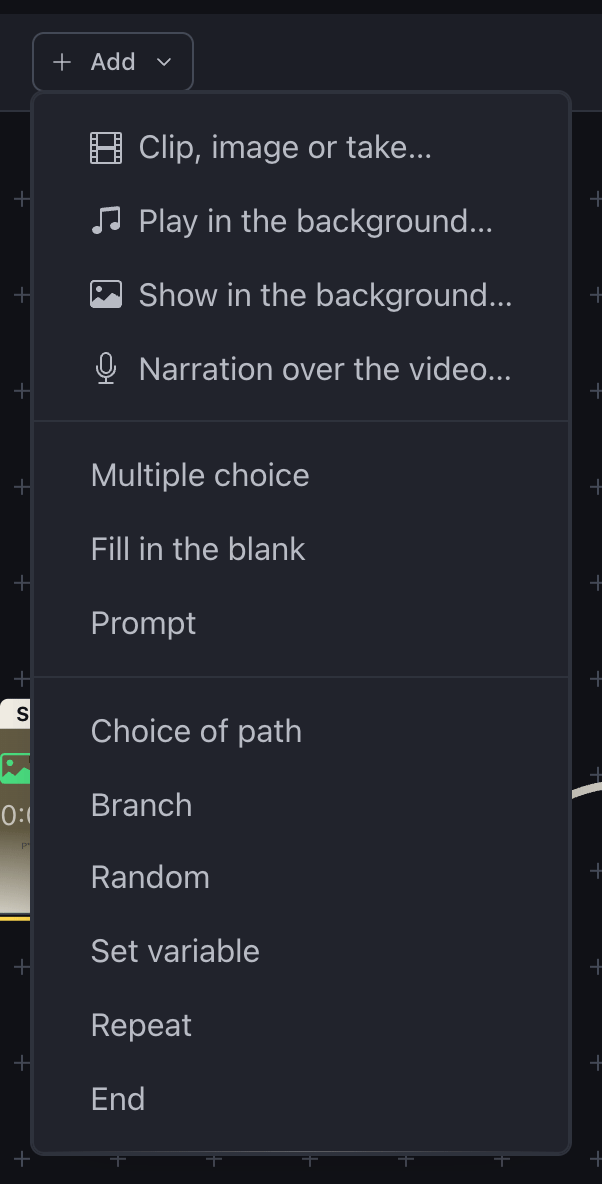
Add in the bar adds a step after the one picked (or at the end):
- Clip, image or take…: a scene, made from something in Video, Audio or Images.
- Play in the background…: music, or a video, that carries on across several steps, and Show in the background…: an image behind several steps (see below).
- Multiple choice, Fill in the blank and Prompt: questions.
- Choice of path: a question where each choice leads its own way ("Section A or section B?"), and Branch, Random, Set variable, Repeat and End: steps that decide what happens next. Only in Interactive and Both.
A step added after a Branch takes its first way out that isn't joined yet (its cases, then Otherwise; with all of them joined, it adds a case). After a Random, it's a new path; after a Repeat, Again, then Done. Each starts a way of its own: it never goes in the middle of another.
You can also drag something from the library's Video, Audio or Images onto the steps: onto a step to add it after that step, onto an empty scene to fill it, or anywhere else to add it after the picked step.
Each step shows its icon (red for video, green for an image or a slide, blue for sound, violet for questions, teal for the others), its name, and a line about it, such as its length. Two steps with the same name are numbered (Prompt 1, Prompt 2). The first step is marked Start.
Joining and arranging steps
The diagram lays the steps out for you, left to right in the order they play. The main way through runs along the top row. A question's other answers, or a branch's other cases, start a row of their own under the step they leave, and join the main way again where they go back to it. A way back to an earlier step loops round under its row. Add, move or remove a step and the rest move along to make room, so it never gets in a tangle. You don't drag steps around.
On a step's right edge is a round handle for each way out of it (Right and Wrong, and so on; a step's only way on, Next, isn't labelled). A way out that doesn't lead anywhere yet shows on the step you point at or pick. At its top right is its ⋯: Settings, Preview (on a scene or a question), Move earlier, Move later and Delete.
- Add a step between two: click the + on the line between them, then pick a kind of step from Add a step here.
- Add a step after a way out: click its handle.
- Join steps: drag from a step's handle onto another step. The handle grows when you point at it, and the step the line would join lights up. Let go on an empty part of the canvas instead, and Add a step here adds a new step, joined to that handle.
- A join's options: click (or tap) the line. A small card opens where you clicked, with Remove this line and, in a project set to Both, Use in the video, which sends the video that way from the step the line leaves (see below). You can also take a join away by clicking the line and pressing Delete.
- Move a step earlier or later: Move earlier and Move later in its ⋯. It trades places with the step before or after it. A step moves only along a single way: not before the first step, past a step that more than one way leads to, or into a loop.
- Move round: drag an empty part of the canvas.
- Zoom: the mouse wheel, or pinch on a trackpad. The buttons in the corner zoom out, zoom in and Fit all steps.
- Open a step: tap (or click) it. It opens in its own editor, over the steps.
- Preview a step: ⋯ › Preview (see Previews).
- Remove a step: ⋯ › Delete, or pick it and press Delete; either asks first. What led to it then goes where it went. A project always keeps at least one step.
With the keyboard
The steps are one stop for Tab: the step you were last on, or the picked one. From there:
- The arrow keys go from step to step: → goes on by the main way, ← goes back, and ↑ and ↓ go to the nearest step in the row above or below. Home and End go to the first and the last.
- Enter opens the step in its own editor. Space picks it (and on a picked scene, plays it).
- Alt ↑ and Alt ↓ move it earlier or later.
- Delete removes it, after asking.
- Tab goes on to that step's ⋯.
A screen reader says each step's name, then where it goes ("Right: Scene 2. Wrong: Review.") and what comes before it.
Joins can also be set in a step's settings, under Next step: Go to for a step with one way out, or one list for each outcome. In a project set to Both, a step with more than one way out also has In the video, go to, to choose which way the video takes. The lines the video takes are heavier and darker than the rest, and (where some steps aren't on it) its steps are tagged Video.
A scene's settings also have Make this the first step.
A step's own editor
Tap a step (or pick it and press Enter) and it opens in its own editor, a sheet over the steps. Every kind works the same way:
- Done (top right) keeps what you changed and goes back to the steps. Back there, one Undo takes back everything you did in it.
- ✕ (top left), or Esc, goes back without your changes. If you changed something, it asks first: Keep changes or Discard changes.
A question, a branch or any other step that isn't a scene opens on its settings (see Questions and Logic steps). A question's has Preview (the play button) beside Done.
A scene's editor: its picture and timeline
A scene's editor has the scene's picture at the top, the time under it with Play beside it, its tracks, the play buttons, and its tools. Space plays and pauses too.
- Step settings (the gear) opens the scene's own settings.
- Undo and Redo, beside the play buttons, go back only as far as when you opened the scene.
A new scene has one video track. A clip's sound is part of the clip (its waveform shows on it); sound you add, such as music, a voiceover or a clip's sound detached (Detach audio in its settings), goes on an audio track, made when it's needed. Each track shows as an icon (a video camera, or a music note), with a number when there are more than one of its kind. Higher video tracks show over lower ones: a camera on video track 2 shows over a slide on video track 1. With only a few tracks, each is taller.
Items show what's in them: a video's frames, a picture, and the sound's waveform. They're made the first time a file is on a timeline, in the background, and kept for next time. In a browser, the browser makes them itself (a recent Chrome, Edge or Safari); one that can't shows the items plain.
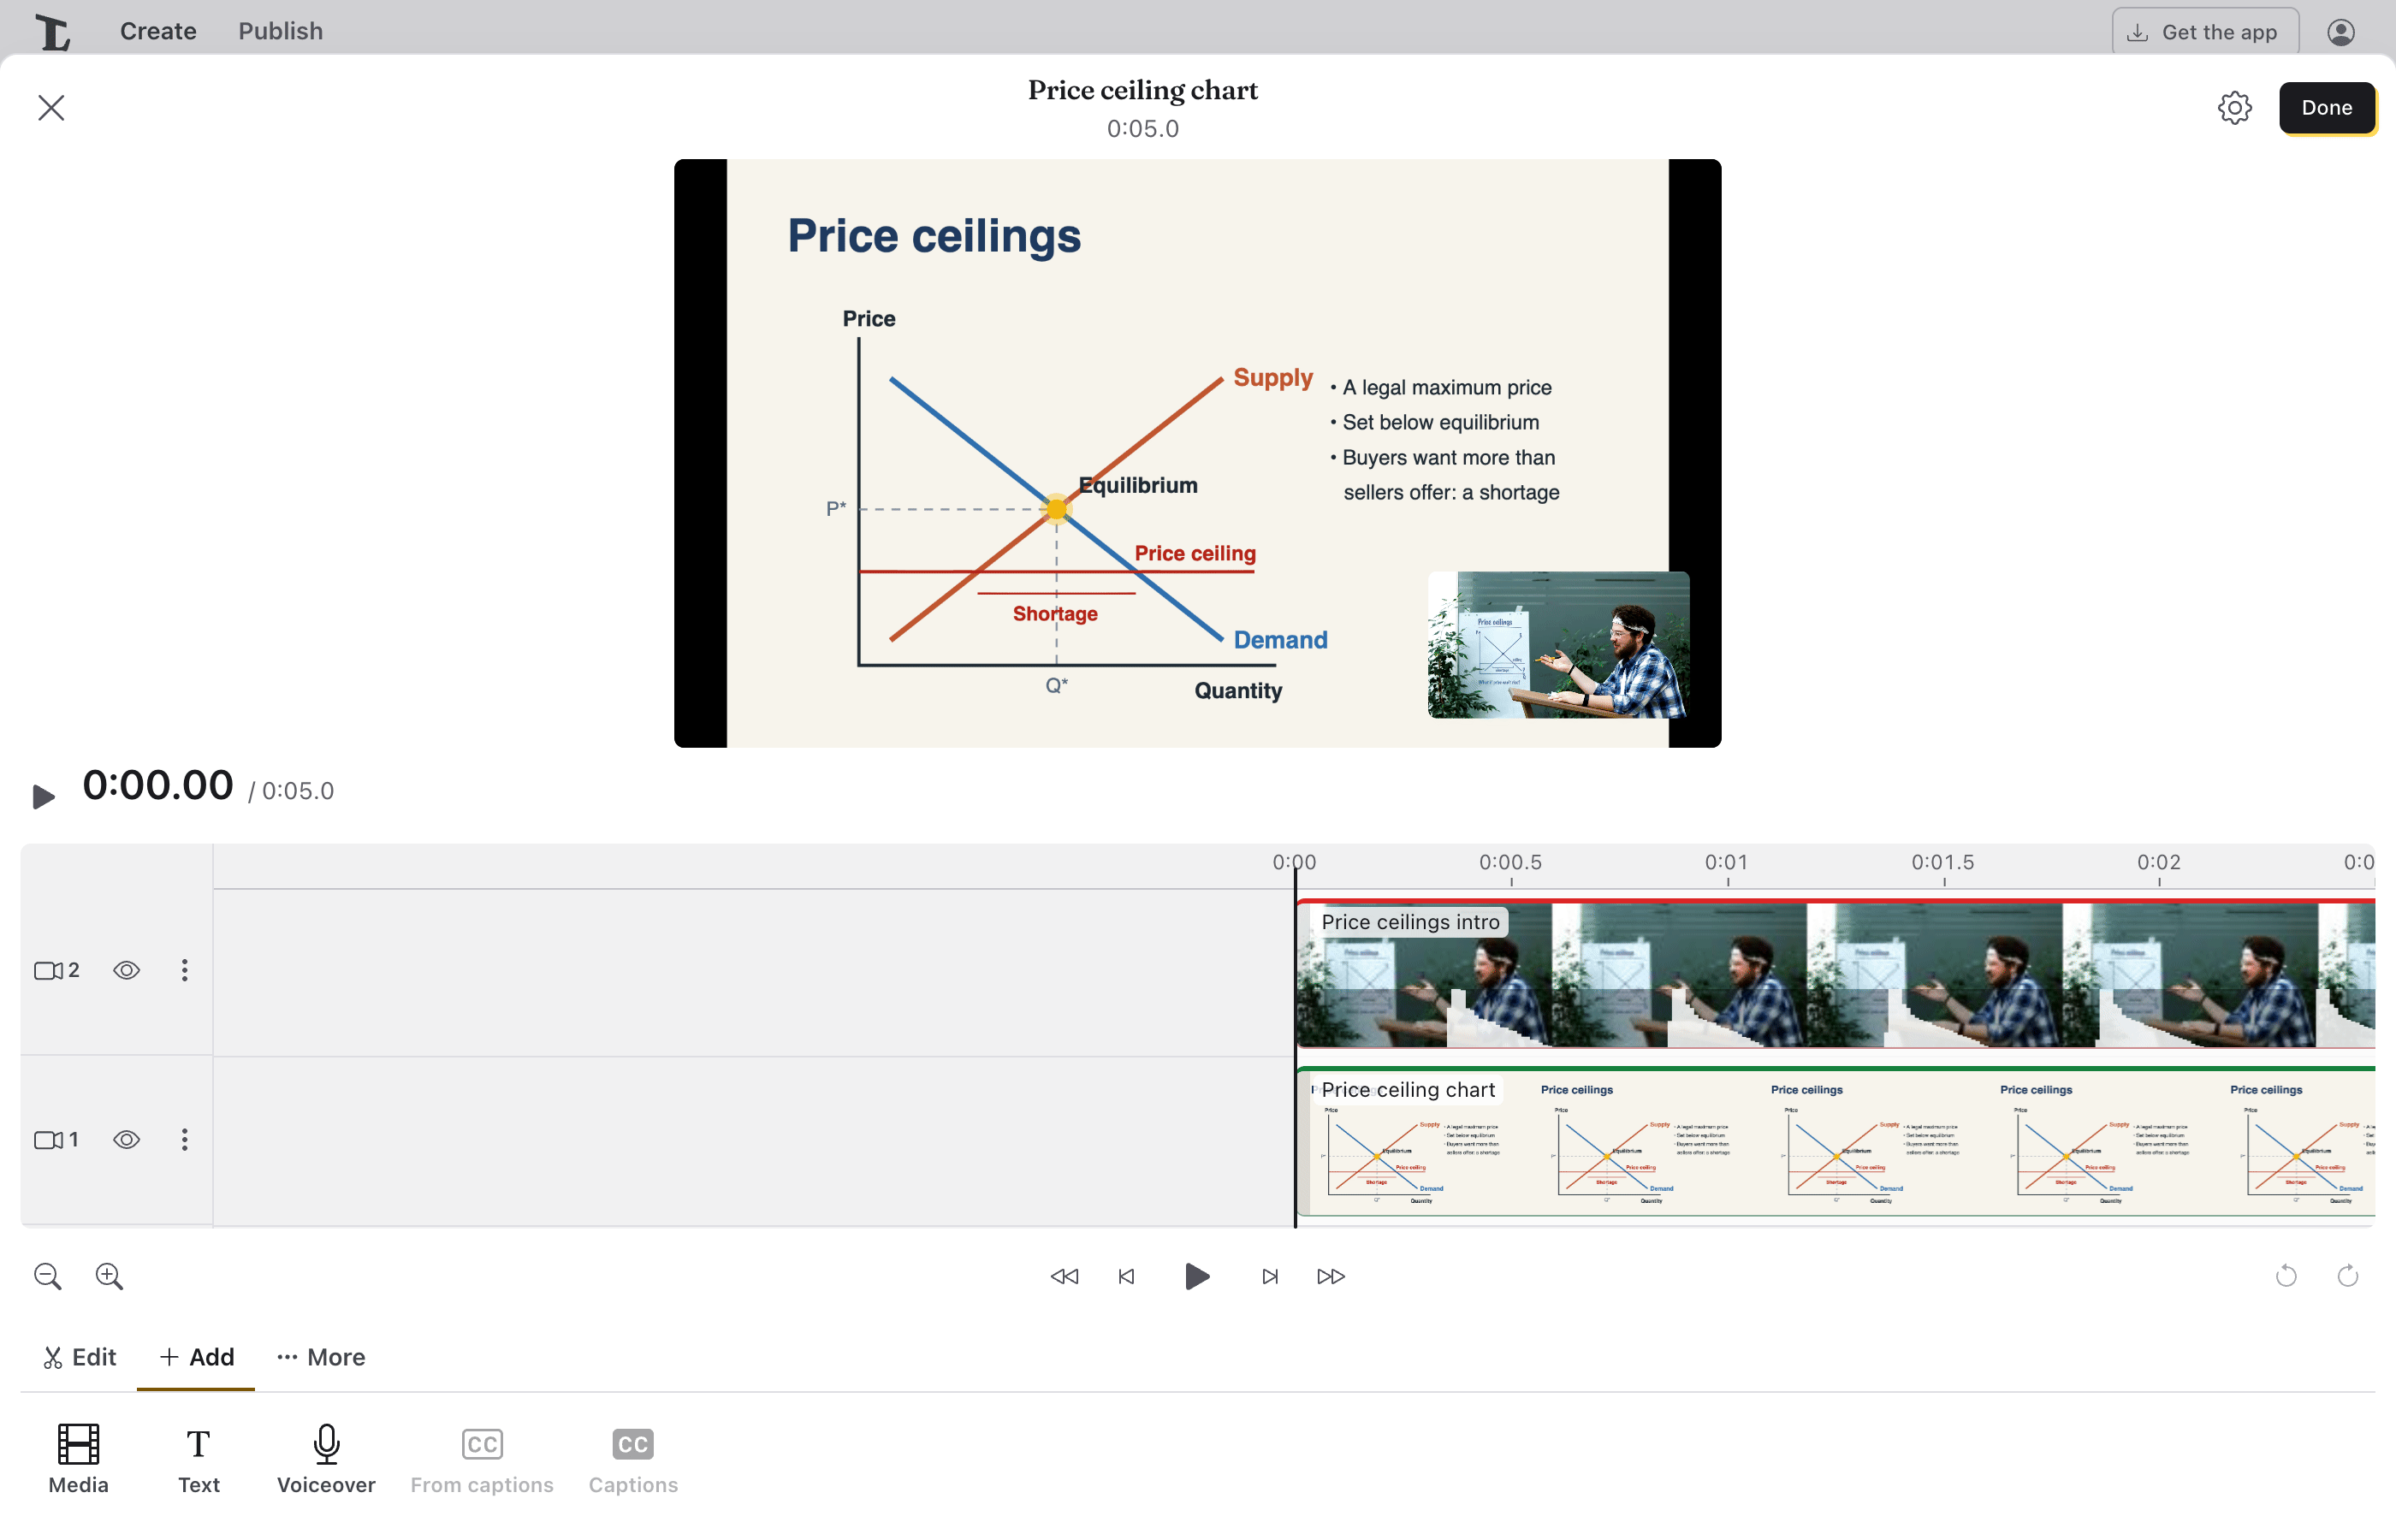
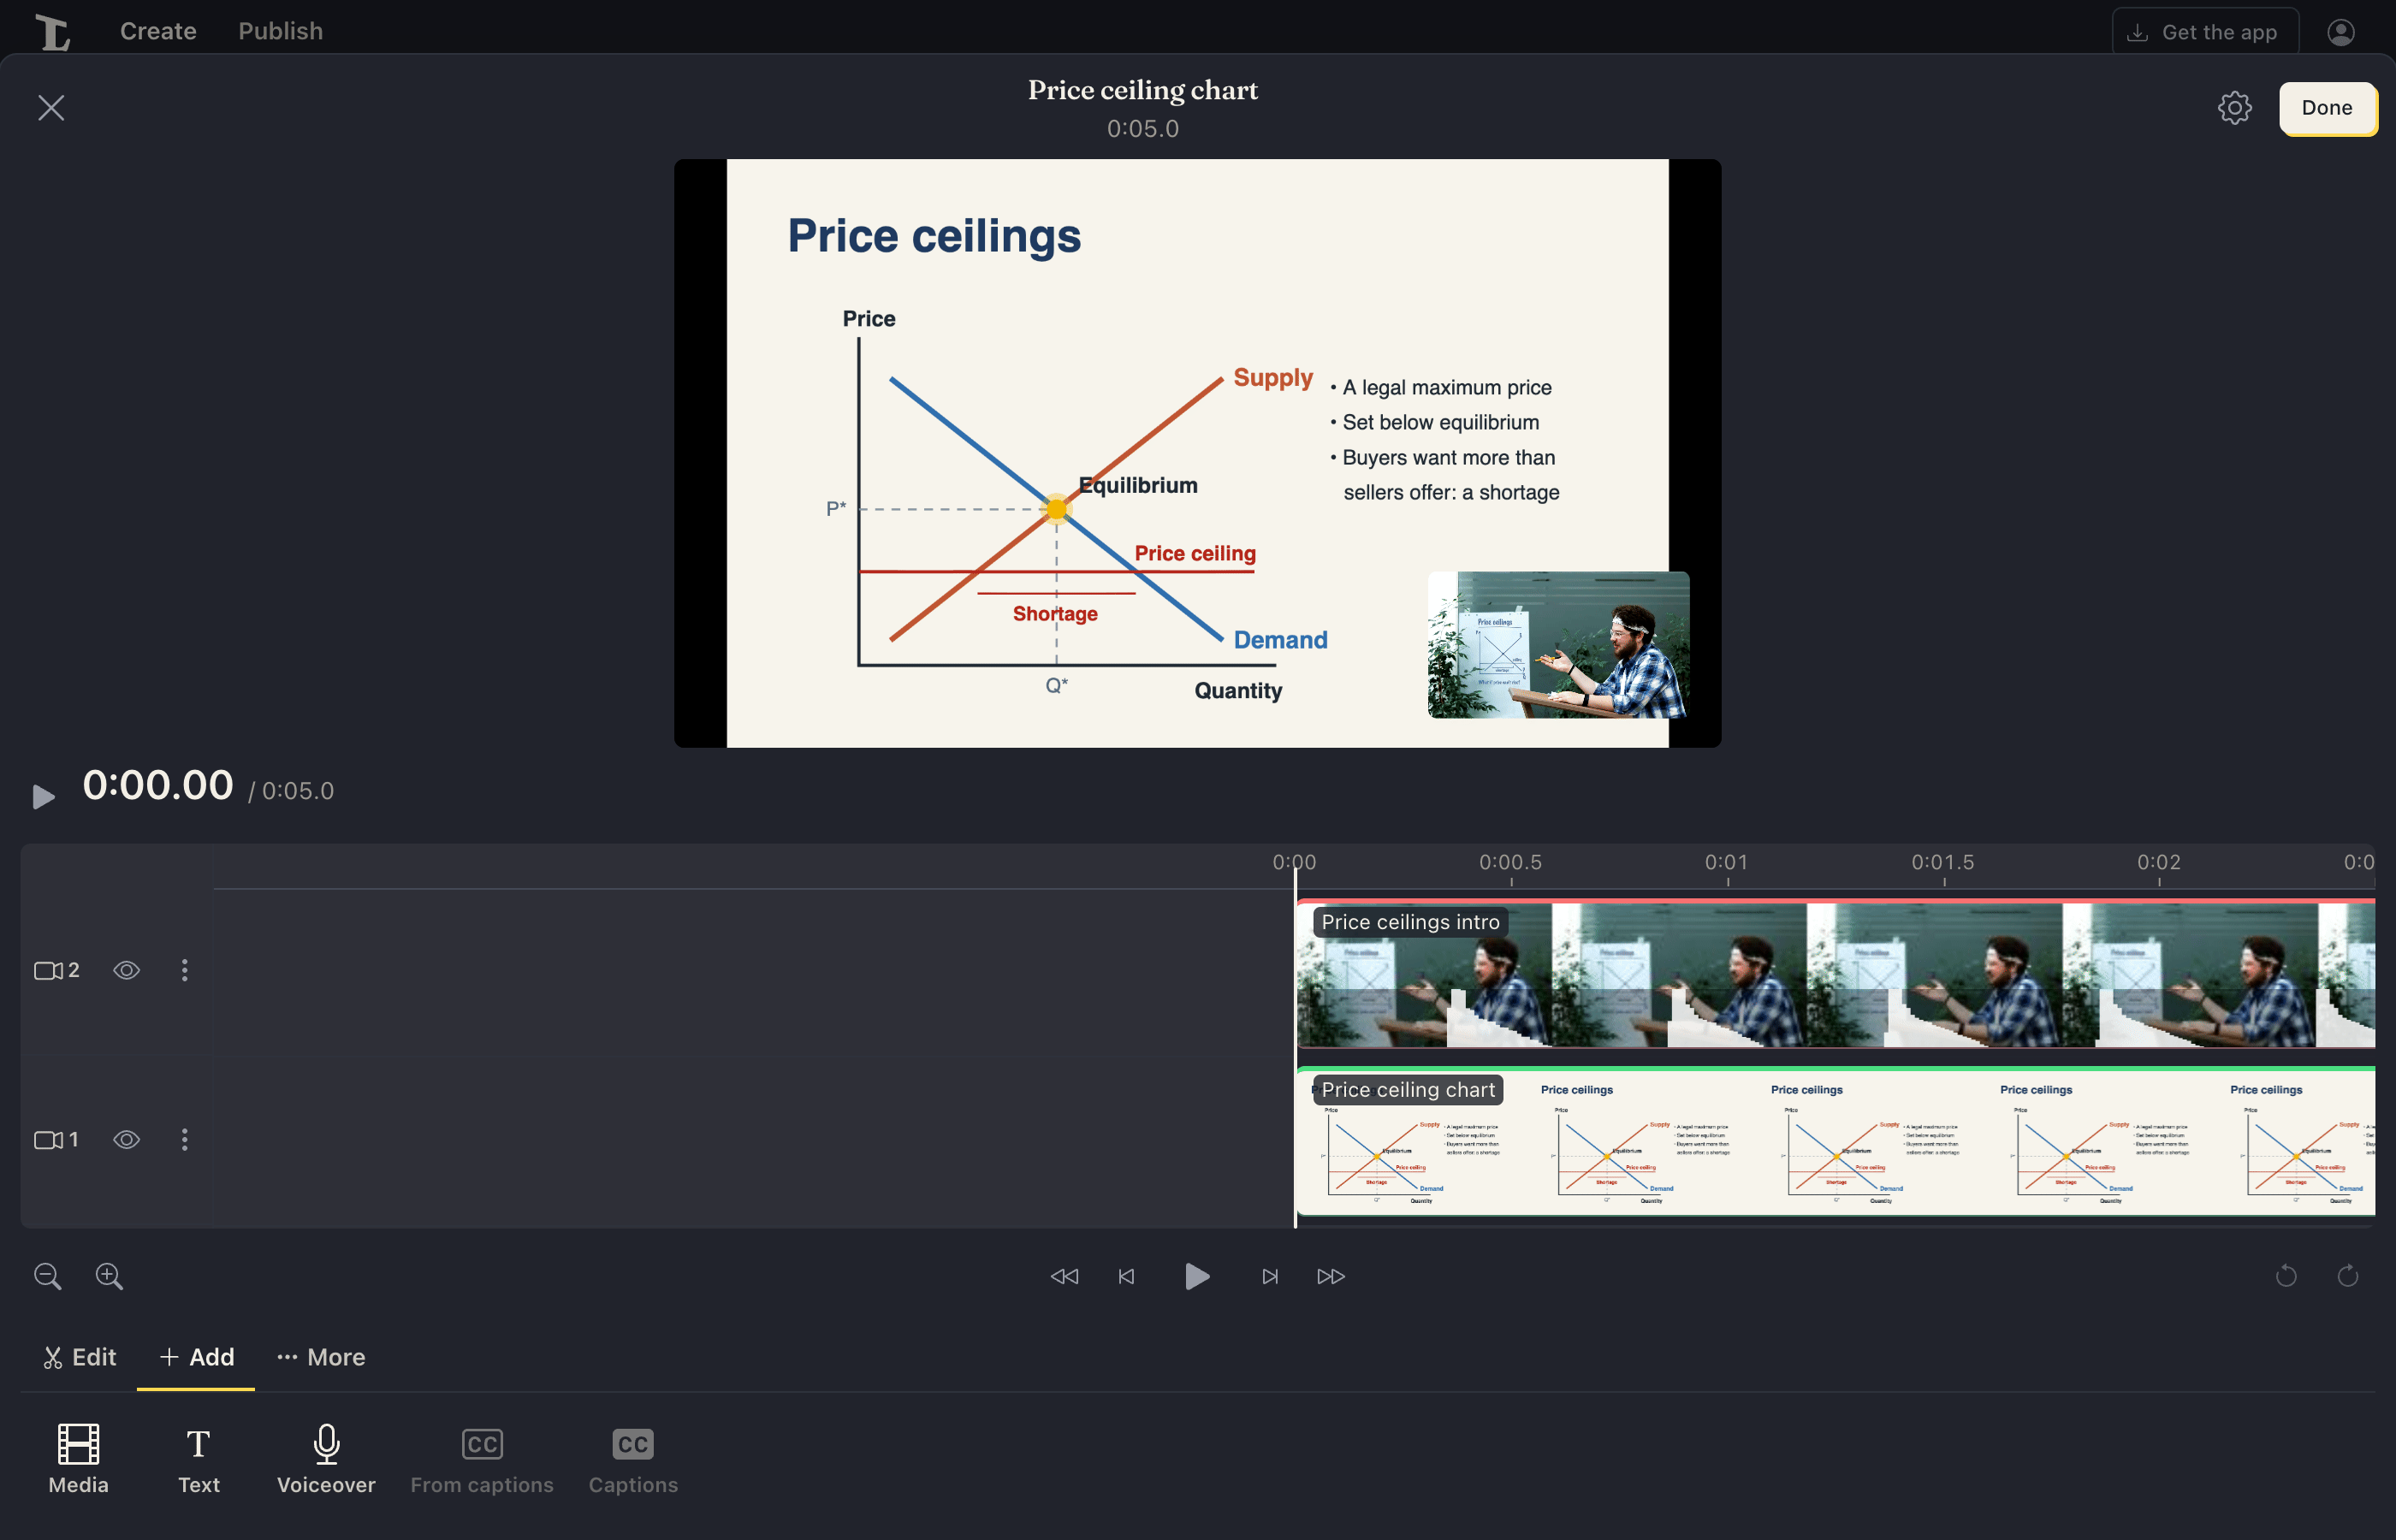
The playhead stays in the middle, and the tracks move under it, as in the clip editor:
- Move through the scene: drag the tracks (anywhere but on an item) or the ruler, or scroll. Tap the ruler to put the playhead there. The playhead goes a little past the scene's end, to put something there.
- Zoom: pinch, or hold Ctrl (⌘ on a Mac) and scroll. Zoom out and Zoom in are beside the play buttons too.
- Play: the play buttons go back and forward 10%, back and on a frame (, and .), and Play (Space) plays the scene in the picture. With the ruler picked, the arrow keys move a frame (with Shift, a second), and Home and End go to the start and the end.
The tools are in three tabs, each a line of buttons. Point at one (or hold it, on a phone) to see what it does.
- Edit:
- Split cuts the picked item in two at the playhead; with no item picked (or the playhead outside it), everything the playhead is in, on tracks that aren't locked. Video, pictures, text and sound all cut, and the second part plays on from where the first stops. Tap an empty part of a track to let go of the picked item. The keys are Ctrl B (as in DaVinci Resolve) or S.
- Delete takes the picked item out (or press Delete).
- Adjust opens the picked item's settings (see below).
- Freeze holds a frame (see below).
- Close gap closes a gap you've tapped (see below).
- Split all (Shift S): everything the playhead is in, on tracks that aren't locked, whatever's picked, as one Undo.
- Delete & close (or Shift Delete) takes the picked item out and moves what comes after it back, on every track, so nothing is left empty.
- Add: Media (a video, image or sound), Text, Voiceover, From captions (a text layer from the scene's captions) and Captions (captions burned into the picture). What you add makes the tracks it needs.
- More: Duplicate, Copy, Cut and Paste (see below), Marker, and Split step, which makes everything after the playhead a new step, named after this one with "(2)".
Taking an item out, or shortening it, leaves a gap where it was. To close a gap, tap it on its track (it shows striped) and click Close gap in it (or in the Edit tools), or press Delete: what comes after it moves back, on every track, to stay in step. If something on another track plays during the gap, it isn't closed; lock that track first to leave it where it is.
Copy or Cut the picked item, then move the playhead and Paste: on the track it came from if that's free there, else on another free track of its kind, or a new one. It pastes into another scene too (open that scene first), and into another project: its recording or image joins that project, with its captions. Duplicate puts a copy right after the item. Each paste is one Undo. The keys are Ctrl C, X, V and D.
Markers are notes at a time: a flag on the ruler. Marker (in the More tools, or press M) adds one at the playhead, named "Marker 1", "Marker 2" and so on. Tap a flag to move the playhead to it; its menu has Rename… and Delete marker. Items snap to markers, and markers move with what's around them when a gap closes. They're only for you: they don't show in the video.
Media you add goes at the playhead, on a free track of its kind; if every track of its kind is busy then, it goes on a new one by itself. Images last 5 seconds; recordings last their whole length.
A video added over another one playing at the same time starts in the bottom-right corner (picture in picture), so both show: your camera over a screen recording, say. Move it or resize it in its settings (see below). An image with see-through parts (a PNG) shows the video under it through them.
- Move an item: click (or tap) it first to pick it, then drag it, along its track or onto another track of its kind. Dragging an item that isn't picked moves through the scene, as dragging anywhere on the tracks does.
- Trim an item: drag either end. Items snap to each other's ends and to the playhead.
- Items never cover each other. Dropped where another item is, an item moves to the nearest place on that track with room for it; a trimmed end stops where the next item starts, unless it touches it (then it rolls, below).
- Roll a cut: where two items touch, drag one's end into the other: the cut between them moves, one getting longer as the other gets shorter, and nothing else moves. Cut to the next item at, in the first item's settings, does the same by its time.
- Beside each track's icon, a button hides a video track (Hide video track 2) or mutes an audio track (Mute audio track).
- The rest is in the track's menu (⋮, Video track 2 options):
- Edit … opens the settings of its item: the picked one on that track, or else the one at the playhead.
- Style all text…, on a track of text (see below).
- Lock track: nothing on it moves or changes, not even when a gap closes on the other tracks. A locked track shows a padlock by its icon. Its items can still be picked, copied and opened (their settings say the track is locked, with Unlock track). Unlock track is in the same menu.
- New track above (video) or New track below (audio): an empty track to drag an item onto. On video, that puts it over the tracks below, to show on top of them; on audio, it's to mute or lock a sound apart from the others. You don't need one to add media.
- Remove track, for an empty track (a scene keeps one video track).
Double-click an item, click Adjust with it picked, or use Edit in its track's menu, for its settings. They're named for what it is: Clip settings, Image settings, Text settings or Audio settings, with a tab for each group of settings (on a phone, swipe the tabs or use the arrows beside them to see them all). Closed and opened again, they open on the tab you were on.
- Timing: Starts at and Lasts. A clip or sound: From (in the recording) and To, the part of the recording it plays, and its Speed (see below). An image: As long as the step's clips and sound, on for a slide under a recording, so it lasts as long as the recording does. When another item starts just as this one ends, Cut to the next item at.
- Sound (a clip with sound, or a sound): Play sound, Volume, Audio alignment (ms) (if the sound is ahead of or behind the picture), and Detach audio, which gives the sound an item of its own on a sound track.
- Picture (a clip or image): its crop, turns and color.
- Position: where it sits, its size and its Opacity, and keyframes to change those over time.
- Transitions (Animation for a text): Fade in and Fade out, and, when another item starts just as this one ends, Into the next item: Cut, Dissolve, Dip to black, Dip to white, or a wipe or a slide, with its Length. A wipe or slide happens inside the item's box: between two pictures-in-pictures in the same corner, the new one wipes or pushes the old one out of that corner, and the rest of the picture stays as it is.
- Step: the settings of the step it's in (see below).
Volume changes (a clip's or sound's) make it louder or quieter over time: put the playhead where the change should start, click Add point at playhead (the point keeps the volume there), move the playhead, and set the Volume: a point is set there, and the volume goes evenly from each point to the next. Each point has its time (At, from the item's start) and its Volume (%) to change, Go to jump to it, and ✕ to take it out; Remove all volume points takes them all away. The timeline draws the volume as a line over the item. On a sound (music, say), Lower volume under speech turns it down to a quarter wherever the step's other sound plays (speech, mostly) and back up in between, in place of its volume changes. Above 100%, the preview plays at full volume; the rendered video is louder.
The bin beside the item's name takes out just the item (Remove clip, Remove image, Remove text or Remove audio), as Delete in the scene's tools does. To take out the whole step, open the step's own settings (with no item picked): its bin is Remove this step.
Speed plays a clip or sound faster or slower: from 0.25× (a quarter as fast) to 4× (four times as fast), or Other… for a speed between, like 1.1. It plays the same part of the recording from the same start, so a faster clip gets shorter on the timeline and a slower one longer; its sound keeps its pitch, and its captions keep up with it. With Move later items to fit (on at first), what comes after moves on or back with its end, on every track that a gap closing would move; without it, a longer clip covers what's after it and a shorter one leaves a gap. A sped-up clip shows its speed on the timeline, like "2×". A clip's sound detached from it gets the same speed.
Freeze (in the Edit tools, or Freeze frame at playhead in a clip's settings) holds the picture at the playhead for 2 seconds: the clip is cut there, with the held frame between its two parts, and what comes after moves on to make room. Then Hold for asks how long, in the line of tools: type a time and press Enter, and what comes after moves on or back to fit. The held frame is a clip of its own marked "Held" on the timeline, and silent. While it's picked, Hold in the tools (or a tap on the held frame) sets its length again, as does Holds for in its settings; dragging its end works too, without moving what's after it. Frame from in its settings picks another frame to hold.
A scene's own settings (its Step tab, or the step's settings with no item picked): Name, how long it lasts, Show as a chapter viewers can jump to, Captions from (when two captioned recordings play at once, such as a camera over a screen recording: whose captions viewers get while they do; the lowest picture's, unless you choose; to switch partway, split the step and choose for each part), and, under Between steps (the Transitions tab), From the step before and Into the next step: how the whole step starts after the one before it on the canvas and ends into the next (Fade goes through black; the others blend the two steps). These are the step's, not an item's: an item's own fades and transitions are in its settings. Next step says where the step leads.
Recording a voiceover
To talk over a scene, open it, put the playhead where you'll start and choose Add › Voiceover. A window shows the scene with the microphone you record with (the one in Settings, which you can change there or in the window). The scene plays without its sound while you record, so only your voice is recorded. To hear it, tick Play the scene's sound while recording (it stays ticked for next time), and wear headphones: through your device's speakers, the microphone would record the scene's sound too.
Press Record. After the countdown (if you've set one in Settings), the scene plays from the playhead while you speak, so your words go with the picture. Recording stops at the scene's end, or when you press Stop (pausing the scene stops it too). With the playhead at the end of the scene, nothing plays: it records until you press Stop, making the scene longer.
The recording is saved in your files like any other, named after the project ("Lecture voiceover 1"), in the folder most of the project's recordings are in, and synced or not as its Sync to the cloud box says. It goes on the scene where you started, on an audio track that's free for its length (a new one, if none is). Not happy with it? Record again replaces it (the last take goes to the Trash), or close the window and Undo (Ctrl Z) to take it out. Once it's there, it's a sound like any other: move it, trim it, or set its volume.
Narration over the whole video
To talk over more than one step, choose Add › Narration over the video… (in Rendered video and Both). The window plays the video along its path, from the step you'd selected or, with Start at, from the start or another step on it. Recording stops at the video's end, or when you press Stop. As with a voiceover, the video plays without its sound unless you tick Play the video's sound while recording.
The recording is saved the same way, then cut where each step ends: each step it was said over gets its part, on a free audio track there, all from the one recording. Where a transition blends two steps, the words go on the step coming in. Question cards have no sound of their own, so what's said over one is left out. One Undo takes all the parts out.
Picture in picture: Position, keyframes, opacity, fades
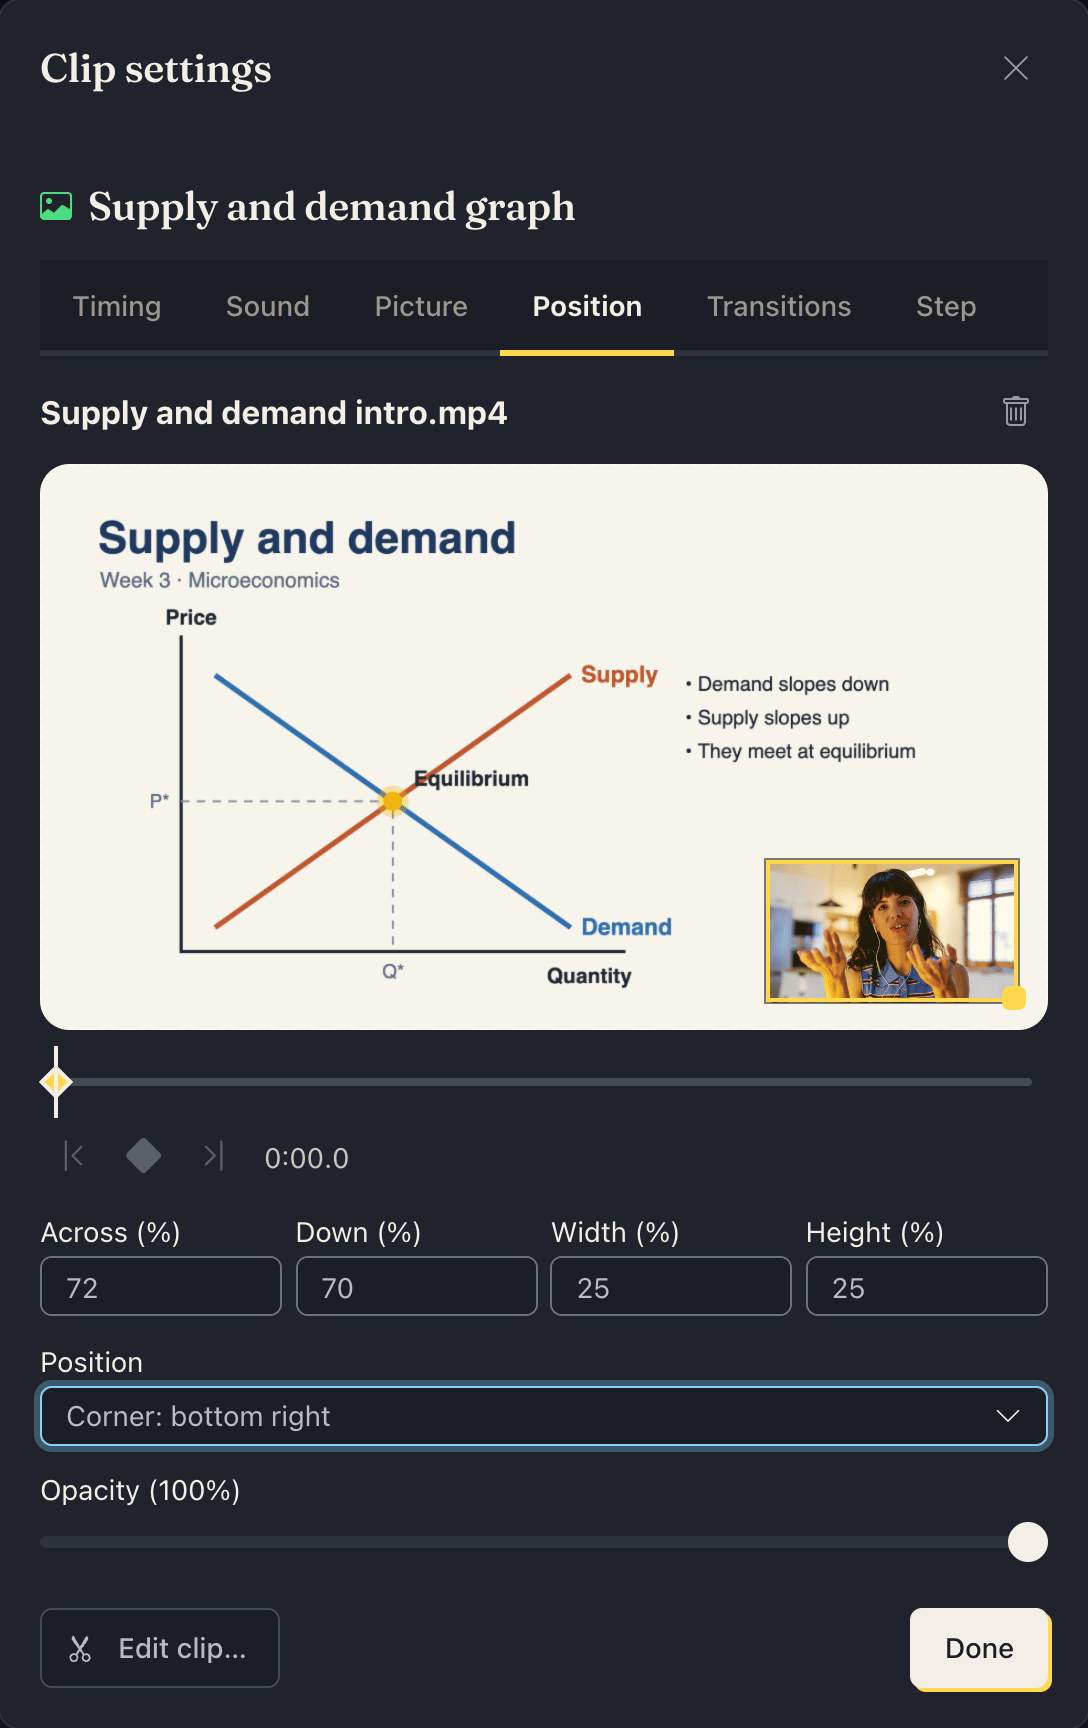
On Position, clips, images and text have a picture of the step at the playhead, with the item's box on it. Drag the box to move it, or its corner to resize it (hold Shift to change its shape). It snaps to the edges, the middle and a small margin. Across, Down, Width and Height set it exactly, in percent of the frame.
Position has ready-made places: Full frame, Corner: bottom right, Corner: bottom left, Corner: top right and Corner: top left. A corner is a quarter of the frame wide, with rounded corners: the usual place for your camera over a slide.
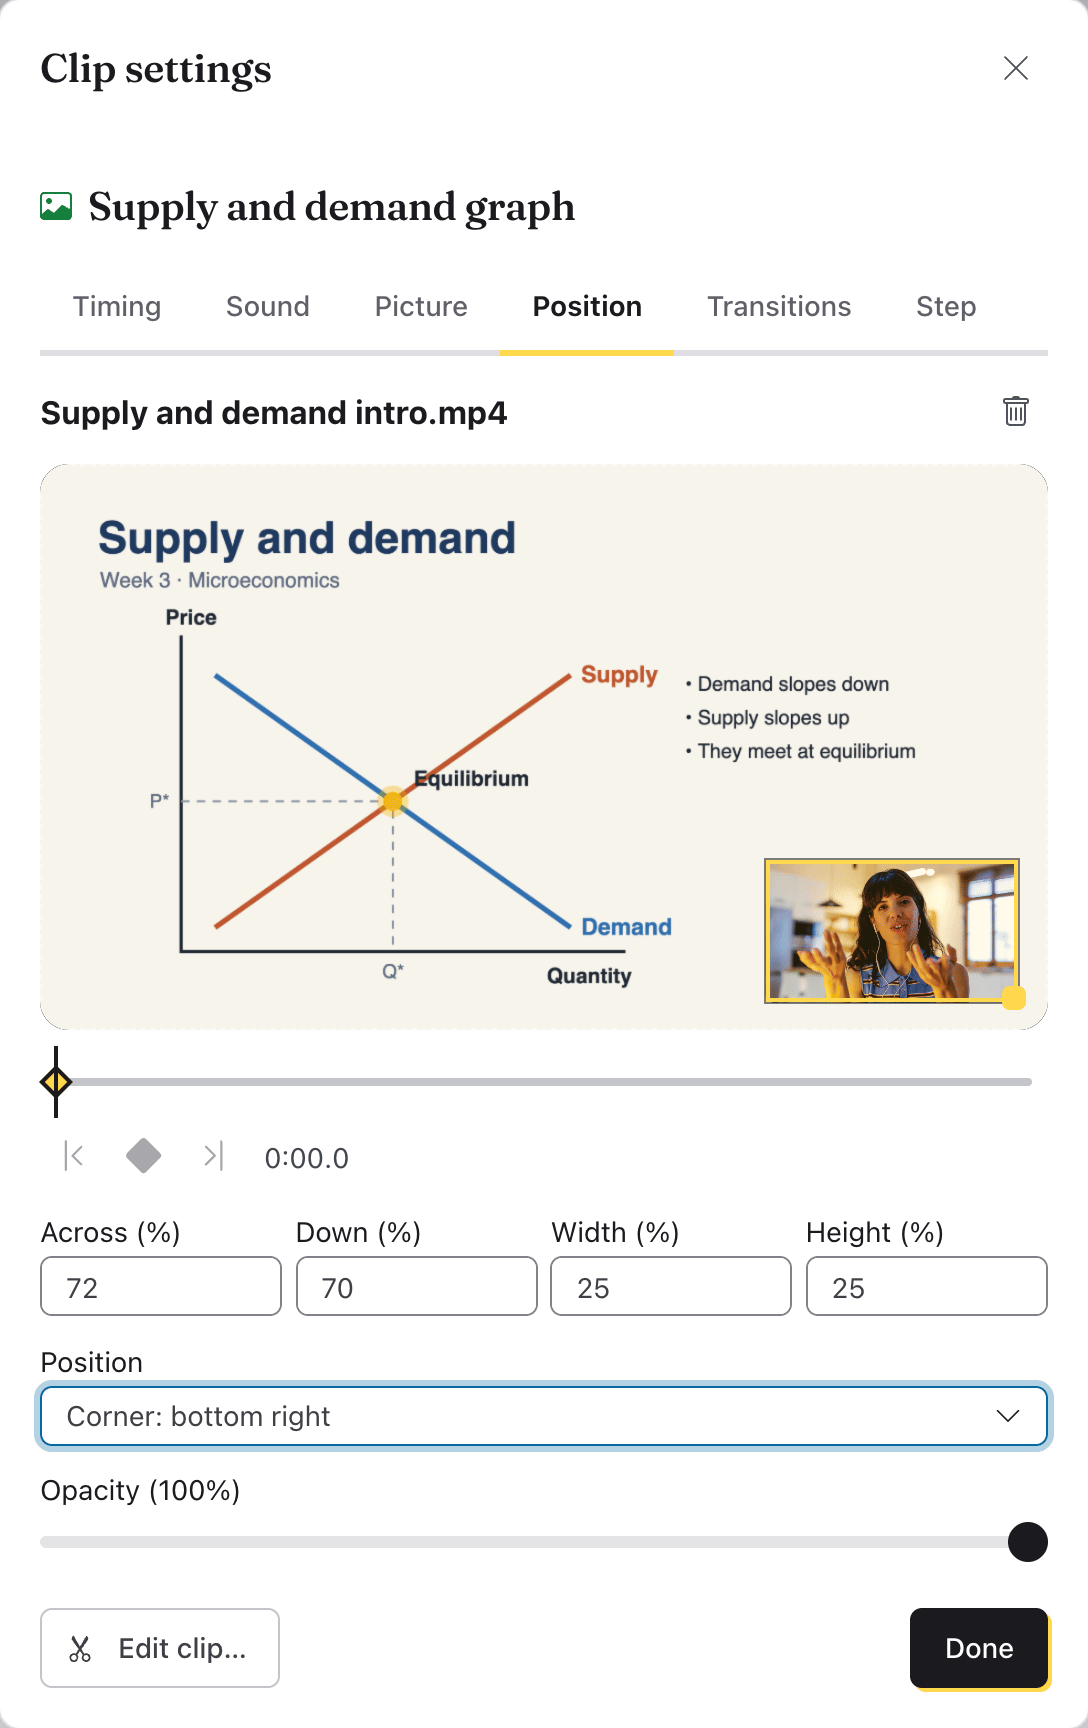
Opacity makes an item see-through: at 100% it's solid. With keyframes (below), it sets the opacity at the playhead.
Crop (clips and images, on Picture) cuts off the picture's edges: its own picture (a clip's at the playhead) is shown with the crop over it. Drag the box to move it, or a handle to resize it, or set Top, Right, Bottom and Left exactly, in percent of the picture (arrow keys move the box too; with Shift, they size it). Shape keeps it to Square, 16:9, 9:16, 4:3, 3:4 or the picture's Original shape; Remove crop takes the crop off. The cropped picture then fills the item's box as the uncropped one did: a square crop of a wide recording shows as a square in the middle of a full-frame item. The preview and the rendered video cut off the same edges.
Under the crop, Turn left, Turn right, Flip left to right and Flip top to bottom turn the picture a quarter at a time or mirror it: a phone video recorded sideways, or a camera that shows you mirrored. The crop stays on what it framed, and a box that isn't the whole frame swaps its shape (a wide corner box becomes a tall one) so the turned picture fills it. Not turned puts it back.
Color and effects
A clip's or image's settings have Color and effects (tap it to open). They change how it looks in this project only: the recording or image itself stays as it is, so the same recording can look different in another project, or in another step.
- Brightness, Contrast, Saturation and Warmth are the image editor's color sliders, worked out the same way.
- Blur softens the whole picture (behind text, or a blurred copy of a tall video filling a wide frame behind it). Pixelate turns it into squares, to hide what's on a screen or who's in it. Vignette darkens it towards the corners.
- Background: Green screen or Blue screen makes the screen behind you see-through, so the tracks below show instead (put the clip on the track above what should show behind it). The screen's color is measured from the picture at the playhead; Screen color changes it. More Strength takes more of the screen (and its shadows) away; less keeps more of what's in front of it.
Each change is one step to undo. Reset color and effects takes them all off. Splitting, copying, duplicating or freezing a frame keeps the look. The preview and the rendered video draw the same look (pixelate's squares can sit a little differently at the picture's edges, and a green screen's edges are a touch softer in the rendered video).
Keyframes move, resize or fade an item over time. Under the picture, a strip as long as the item shows its keyframes as diamonds; the first is where the item starts. Click or drag along the strip to move the playhead (the picture follows, and the playhead snaps onto a diamond near it), or use the arrow keys (Shift for a second at a time). Put the playhead where the change starts and click the diamond button to add a keyframe there (it keeps the box and opacity the item has there). Move the playhead on and change the box or the Opacity: a keyframe is set there. The arrows beside it go to the previous and next keyframe, and on a keyframe the diamond button removes it. Drag a diamond along the strip to change when that keyframe is.
The item glides from each keyframe to the next. On a keyframe, Into this keyframe sets how it gets there: Smooth speeds up and slows down, Even moves at one speed. The picture draws the item's path through each keyframe, and the strip shades where the item is moving and draws its opacity when that changes, so a picture-in-picture can fade to half partway through and come back. The crossed diamond removes all the keyframes.
Text
In a scene, Add › Text shows a few looks to start from, each as it will look on the picture: Plain text, Title (big, in the middle), Subtitle, Lower third (a name with what they do on a smaller line under it, bottom left, on a box), Caption (bottom, on a box), Corner tag, Outlined (big words with a dark outline, as on social video) and End card ("Thanks for watching"). Tap one: it's added at the playhead, for 3 seconds, on a video track above everything playing then (a new track, if none has room), so nothing covers it. Several texts at the same time each get a track of their own. Change its words and look afterwards: double-click it for Text settings. On the Text tab:
- Text: what it says. Enter starts a new line.
- Font: six that come with Lectern, so text looks the same on every device, in exported videos and in shared links: Montserrat (sans serif), Oswald (a tall headline), Fraunces (serif), Nunito (rounded), Caveat (handwritten) and JetBrains Mono (typewriter). Each is shown in its own letters. After them, This device's sans serif, serif, rounded, headline, typewriter and handwriting, which look a little different on each computer or phone.
- Size: from 2 to 40, how tall the letters are as a share of the frame's height (its width, in a tall project).
- Bold, Italic, and lined up left, center or right.
- Smaller lines after the first: for a name and title, the first line stays large and each line after it is smaller and not bold. Press Enter in the text to start a new line.
- Color, with a few colors to pick at once, or any other.
- Behind the text: Nothing, A shadow (to read over a busy picture), An outline around each letter, with its own color, or A box, with its own color and how see-through it is.
Position has where it sits and its Opacity, and Timing when it starts and how long it lasts. On Animation, a preview shows the text at rest, with Play to watch it come in and go out:
- Comes in and Goes out: how it arrives and leaves, each taking as long as its Length (half a second to start with). It Fades in, Rises into place, Slides in from the left or right (from off the picture), Pops in, Types in, letter by letter, or comes in Word by word; going out, the same backwards (Sinks away, Slides out to the left, Erases letter by letter and so on). Title rises in, Lower third slides in from the left and back out, and Outlined comes in word by word; change them here, or pick Just appears and Just disappears. The preview and the rendered video move it the same way. Next to another text with a transition between them, the transition comes in or goes out instead.
Text from captions
In a scene, Add › From captions turns the scene's captions into text, one per caption, on a new video track on top. It's drawn into the exported video and shared links. If the scene has captions in more than one language, pick which. They start out looking like captions: white on a dark box, across the bottom of the frame. It's a copy: fixing a caption later doesn't change the text layer. The button is greyed out when the scene has no captions yet.
To change how all of it looks at once, use Style all text… (the T on the track): the same choices as Text settings, for every text on the track. Each text can still be changed on its own, too.
To draw the captions themselves into the picture, kept up to date as they're fixed, use Add › Captions instead (see Burned-in captions).
Questions: multiple choice, fill in the blank, prompts; right and wrong answers
A question opens on what viewers see: its question and its answers. Its Name (the step's label in the graph) and Kind (you can switch kinds; the text stays) are under More options.
Multiple choice: a Question and its Choices (Add a choice for more). Question type says how it's used:
- Path: each choice has its own way out on the canvas. Join each to a step: "Section A or section B?", say. A choice with no text yet shows as "Choice 1", "Choice 2" and so on.
- Quiz: tick the right choices. Its ways out are Right and Wrong. Tick More than one answer is right if more than one is.
- Poll: viewers pick any number of choices, then everyone goes on the same way, by Answered.
In a Rendered video project a choice of path can't branch: it shows as a card, and the video goes on. Its settings say so, and Make interactive (keep the video too) sets Output to Both.
Fill in the blank: write the Text with each blank as
[[1]],[[2]]and so on. Give each blank its answers, separated by commas, and tick Match capitalization if they must. Ways out: Right and Wrong.Prompt: some Text and a Button (Continue unless you change it). One way out, Answered.
Viewers click Submit, and see Right or Not quite, and any Feedback you've written for it (see below).
Display sets how it looks, with a small picture of it at the top. Viewers see the same in the player and on the cards in a video:
- Layout: Position (the middle, the top or bottom, a side, or a corner) and its Width (Narrow to Full width). For multiple choice, Choices puts them One under another, Two to a row or All in one row.
- Text: its Font, Size and Alignment, the Text color and the Panel color (which can be see-through). If the text and the panel are too close in color to read, it says so. Reset look undoes all of these.
- Background: Last frame (of the step before), Image… or Color. Darken sets how much darker that's made under the question: none at all, say, for a question in a corner over the picture.
In Interactive and Both:
- Length: Until the viewer responds, or A set time with a Time limit. When time runs out, it leaves by Time's up.
- Points for a right answer, added to the viewer's score: 1 to start with.
- Feedback: a line viewers read After “Right” and one After “Not quite”: why, or a hint. Left empty, they see just Right or Not quite.
- Save the answer to a variable, for a branch to use later.
In Rendered video and Both, In the video sets how long the question shows as a card (Question shows for), and whether the answer follows (Then reveal the answer, Answer shows for). Until you change them, they follow Publish's Questions setting.
Logic steps: branch, random, set, repeat, end
Only in Interactive and Both:
- Branch: goes the way of the first Case that's true, otherwise by Otherwise. A case checks the Score or a variable: "Score is at least 3", say. Add a case for more; each case has its own way out.
- Random: picks one of its ways out at random each time. Give each a weight to make it more likely. Don't pick the same path twice in a row is on to start with.
- Set variable: changes variables as viewers pass: a variable becomes a value, or goes up by an amount. Add a change for each; the × beside one removes it.
- Repeat: leaves by Again the number of times set, then by Done. Good for "try again" loops.
- End: playback stops here.
Variables are made in Project settings (in the ⋯ beside the project's name), under Variables, each with a starting value. The score is always there.
The problems list notes a branch with no cases, a random step with no paths, a set step with no changes, and a repeat with nothing joined to Again.
Background: across several steps
Add › Play in the background… adds music or a video, and Show in the background… an image, that carries on across several steps. It starts at the picked step and ends with the last step on every branch.
It shows in a strip along the bottom of the diagram, Background (there once you've added one), with a line up to the step it starts at (a dot) and each step it ends after (a square). Drag a dot or a square onto another step to change where. Double-click it or click its gear for its settings (Background audio settings, Background video settings or Background image settings):
- Starts at and Ends after (it stops after the first checked step it reaches; if the project branches, check a step on each branch). Play to the end of every branch sets them all.
- Loop, and Start the video at (or Start the audio at).
- While waiting for an answer: Keep playing, Play quieter or Pause, then resume.
- Sound: Volume, Fade in, Fade out, and Lower volume when a step has sound (music starts at 30% under talking).
- A video: Use, Video and sound or Sound only.
- A video or image: Size, Fill (crops edges) or Fit (shows all). It shows wherever a step has no video of its own.
One recording used across many steps
A long recording can be split into steps, with a question between parts:
- Split step (in a scene's More tools) makes the rest a new step.
- Continue this recording in a new step in a scene's settings adds a step after it with the rest of the recording.
- In a clip's settings, Start where "…" ends starts it where another step's part of the same recording ends.
A scene's settings list each step that uses the same recording (Uses of …), with the part each plays. Adding a recording the project already uses reuses it; the list to pick from marks it In this project.
Changing a clip a project uses
A project uses the recording itself, not a copy. If you save over it in the clip editor (cut it, speed it up, change its sound), every project that uses it plays the new version, with each step's in and out points where they were. What plays there, and the text and pictures timed to it, may have moved. The clip editor says which projects use a recording, under its times.
Once it's saved, each step that uses it shows a warning sign beside its ⋯, and it's in the problems list. Check that the step still lines up (preview it), then click the sign (or open the step's settings) and click Mark as OK.
To change a clip without leaving the project, open its step's Settings (or the clip's, with Adjust in the scene's editor) and click Edit clip… (Edit audio… or Edit image… for those). The clip editor opens over the project; Back to the project closes it. Save as there makes a new file, which the project doesn't use.
Problems, and how to fix them
The project is checked as you work: for missing media, empty steps, and ways out that lead nowhere. When there are problems, a button in the bar says how many (with none, it isn't there). Its sign is a warning triangle, or a stop sign when something must be fixed before the video can be made. Click it and the list opens in a window of its own; click a problem to pick the step it's about and open its settings.
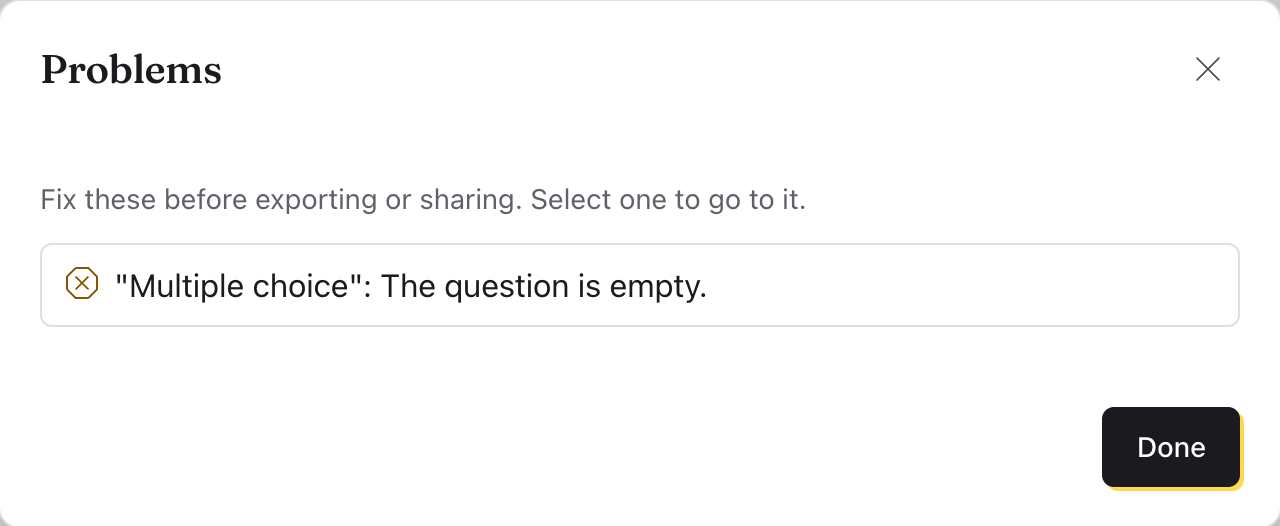
Some you might see:
- "Scene 1" is empty.
- Nothing leads to a step (it can never play).
- A question has no text, or no choice marked right.
- A step leads different ways for different answers, but a rendered video can only go one way: join its answers to one step, or set Output to Both.
- The steps loop back, so the video would never end.
- A clip was changed in the clip editor since it was added to a step (see Changing a clip a project uses).
On Publish, the same problems open from the button beside the project's name (1 issue detected), each with Show in the editor.
Previews: one step, or the whole project
Previews play in a window over the editor, starting as it opens.
- Preview on a scene or a question plays just that step. Space does the same for the picked scene.
- Preview project in the bar plays the whole project: as the video in a Rendered video project, and as a viewer goes through it, answering questions, in an Interactive one. In a Both project it asks which: Video or Interactive. Score shows when questions give points.
In the window, Space plays and pauses. From the start is beside Play, and, for the whole project, Next step. A Captions list shows recordings' captions, if they have any.
Project settings
In the ⋯ beside the project's name:
- Output: what it makes (see Output).
- Picture › Shape: Wide, Tall, Square, Portrait or Classic (see Shape).
- Variables, for branches and scores (Add a variable).
- Viewers: Skipping: Can skip back and forward (Back 10 s and Forward 10 s, and the arrow keys, within the step that's playing: never past a question), Can go back, not skip ahead (forward only as far as they've already watched) or Can't skip (no skip buttons); List chapters to jump to; and Start with captions on (on at first; turn it off if captions are burned into the picture). Viewers can turn captions on or off either way.
- Keep viewers' answers (on at first): a shared link sends each viewer's answers to its questions to Lectern, kept for you for a year. Turned off, viewers still get their score, but the link sends nothing about who watches: no answers, names or ids. For students in grades K–12, or anyone under 13, turn it off unless your school has a data agreement with Lectern.
- Ask viewers their name: with answers kept, the link asks each viewer's name before they start, and keeps it with their answers. Otherwise viewers who aren't signed in are known only by a random id.
To see the answers, with charts for each question and a spreadsheet to download, see Viewers' answers.
See also
Something here wrong or unclear? Tell us.